by Divan Smit | Feb 16, 2026 | Coils & Atomizers
Reading Time: 4 minutes
Picture this: You’ve carved out time for a relaxing building session, your favourite music playing, ready to create the perfect coil. Then you discover your cotton has developed an odd smell from improper storage, your wire cutters have mysteriously vanished, and the wire you thought you had plenty of is down to the last few centimetres. We’ve all been there, and it’s frustrating enough to make you question why you build at all.
The difference between occasional building frustration and consistent, enjoyable sessions lies not in skill level, but in maintaining a proper toolkit. Here’s how to equip yourself with everything needed for perfect coils, every time.
Why Your Building Supplies Matter More Than You Think
Two builders can follow identical tutorials, wrap the same number of coils at the same resistance, yet achieve dramatically different results. The variable? Quality of supplies. Poor cotton introduces off-flavours that no amount of priming eliminates. Inconsistent wire creates hot spots no matter how carefully you build. Inadequate tools turn simple tasks into frustrating challenges.
Get professional results with our complete range of building supplies and tools for rebuildables designed to eliminate these variables and let your building skills shine through.
Understanding Wire Types and When to Use Each
Kanthal: The Builder’s Foundation
Kanthal remains the most beginner-friendly wire option for good reason. It works in wattage mode exclusively, heats consistently, maintains shape well during building, and forgives minor technique errors. Most importantly, it delivers reliable performance without requiring temperature control capabilities.
Available in gauges from 22 to 32, Kanthal suits nearly any building style. Lower gauges (22-24) heat slowly, ideal for large coils and high wattage devices. Higher gauges (28-32) heat rapidly, perfect for mouth-to-lung setups and lower wattage preferences.
Stainless Steel: Versatility Defined
Stainless steel wire functions in both wattage and temperature control modes, making it exceptionally versatile. The flavour profile differs subtly from Kanthal—many builders describe it as cleaner or crisper, though preferences vary individually.
SS wire requires slightly more careful handling during building as it’s less rigid than Kanthal, but the flexibility also makes it easier to work with once you’re comfortable with the material.
Nichrome 80: The Rapid Heater
Nichrome 80 heats faster than Kanthal at equivalent resistance, delivering quick ramp-up times that suit impatient vapers. This rapid heating makes it popular for complex builds where slow ramp-up would frustrate users.
The trade-off? Nichrome requires wattage mode exclusively and tends to be less forgiving of hot spots than Kanthal, making it better suited to experienced builders.
Pre-Made Clapton Wire: Advanced Performance Simplified
For builders seeking enhanced flavour without the complexity of wrapping Clapton wire themselves, pre-made options like the Hellvape A1 MTL Clapton 30/38 offer professional results immediately. These coils combine core wire with outer wrapping that increases surface area, delivering superior flavour whilst maintaining MTL-friendly resistance levels.
Pre-made Claptons work particularly well for builders who want to experiment with advanced coil types before investing time in learning to wrap them manually.
Hellvape A1 MTL Clapton 30*38 (10pce)
The Hellvape A1 MTL Clapton Prebuilt Coils are crafted from premium Kanthal A1 for clean, flavourful MTL vaping. With a precise 30/38 gauge structure and 2.5mm inner diameter, these prebuilt coils are easy to install and deliver consistent, smooth draws. Optimized for single (1.8Ω) and dual (0.9Ω) coil setups, they offer reliable performance and rich taste. Get your pack of 10 at Vaper’s Corner and upgrade your rebuildable atomizer experience.
View Product
Selecting Quality Cotton for Superior Flavour
Why Cotton Quality Matters
Cotton serves as your flavour medium, holding e-liquid and delivering it to your coils. Low-quality cotton introduces off-tastes, breaks down quickly, and may contain processing chemicals that affect flavour. Premium cotton, conversely, remains neutral, lasts longer, and handles e-liquids efficiently.
The BP Mod Pro Vape Cotton represents this quality difference—specifically processed for vaping without unnecessary additives that compromise flavour.
BP Mods Pro Vape Cotton
BP Mods Pro Vape Cotton is engineered for high-performance vaping with fast wicking, rapid flavour switching, and superior heat resistance. Made from 100% organic long-staple cotton, it’s ideal for advanced rebuilders who demand purity and durability. Choose between 2.5mm or 3.0mm options, conveniently packed in a resealable tub to keep your cotton fresh. Now available at Vaper’s Corner—premium cotton for a premium vape.
View Product
Japanese Versus Egyptian Cotton
Japanese organic cotton became the vaping standard due to its neutral flavour profile and consistent density. It wicks efficiently without being too loose or too tight, making it forgiving for builders still mastering wicking techniques.
Egyptian cotton offers slightly different characteristics—often described as fluffier with marginally better wicking properties for very sweet or thick e-liquids. Neither is objectively superior; preference depends on your building style and e-liquid choices.
Proper Cotton Storage
Even premium cotton degrades when stored improperly. Keep your cotton in sealed containers away from humidity, strong odours, and direct sunlight. A small airtight container in a cool, dark drawer maintains cotton quality indefinitely, whilst exposed cotton can develop musty flavours within weeks.
Essential Building Tools Every Builder Needs
The Core Toolkit
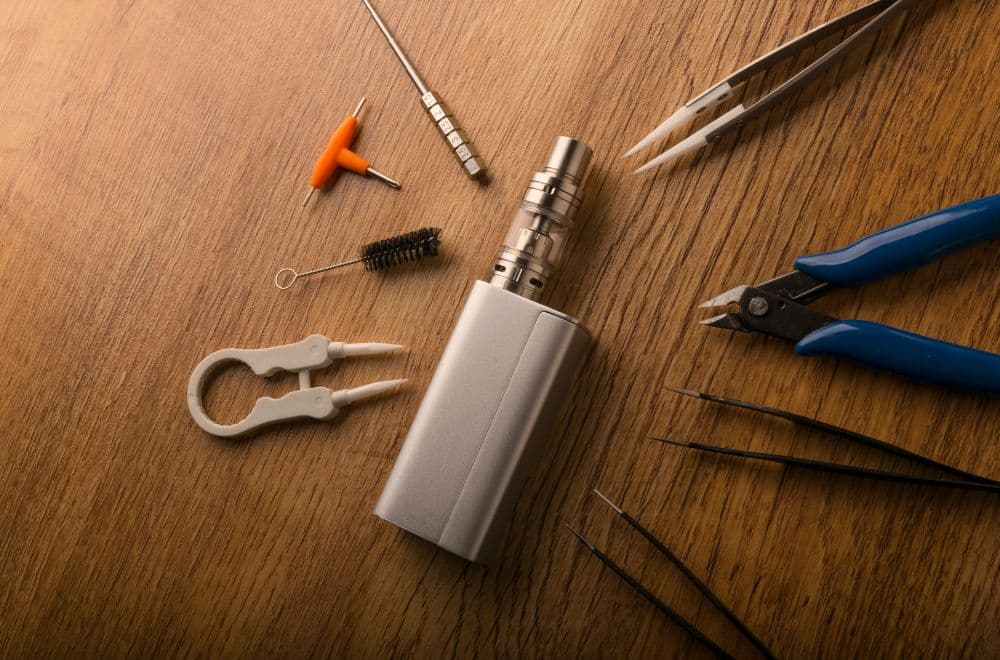
Ceramic Tweezers: Non-conductive tweezers let you position and compress coils whilst firing without risk of shorts. This tool proves indispensable for eliminating hot spots and achieving even heating.
Flush Wire Cutters: Standard cutters leave sharp wire ends that scratch build decks and create shorts. Flush cutters trim wire cleanly, leaving smooth ends that won’t cause problems.
Coiling Rods or Jig: Consistent coil diameter requires precise wrapping tools. Simple coiling rods work perfectly for experienced builders, whilst coil jigs help beginners achieve uniform wraps more easily.
Precision Screwdriver Set: Build deck screws require proper tools to avoid stripping. A quality screwdriver set with appropriately sized bits prevents damage to your atomizers.
Ohm Reader: Whilst regulated devices display resistance, dedicated ohm readers help troubleshoot builds and verify accuracy before installation. They’re particularly valuable for checking brand-new builds for shorts.
The All-in-One Solution for Beginners
New to building and unsure which individual tools to purchase? The Coil Master Mini DIY Kit consolidates essential tools into a single package, ensuring you have everything needed for successful builds without purchasing items separately. These comprehensive kits eliminate guesswork and provide quality tools at better value than buying individually.
Coil Master Mini DIY Kit
The Coil Master Mini DIY Kit is the ultimate portable toolset for vapers. It includes all the essential tools needed for coil building, maintenance, and more, all packed in a compact, outdoor-friendly case. Perfect for experienced builders, this kit is your all-in-one solution for coil customization on the go.
View Product
Tools That Elevate Your Building
Wire Straightener: Pre-straightening wire before wrapping creates more uniform coils with less effort. This simple tool eliminates kinks and curves that cause uneven wraps.
Build Mat: Silicone mats provide heat-resistant work surfaces that won’t scratch atomizers or lose tiny screws in carpet fibres. They also make cleanup significantly easier.
Magnifying Glass or Headlamp: Proper lighting and magnification help you spot imperfections, position coils precisely, and thread cotton accurately—especially valuable as eyes age.
Battery Safety and Charging Equipment
Why Proper Charging Matters
Building your own coils often goes hand-in-hand with using mechanical or high-power devices that demand proper battery care. Poor charging practices create safety hazards and shorten battery lifespan dramatically.
The Golisi GL-4 18650 Battery Charger represents the kind of dedicated charging equipment serious builders require—offering individual bay monitoring, multiple safety features, and optimal charging rates that preserve battery health.
GOLISI GL-4 18650 Battery Charger
Step up your charging game with Vapers Corner’s Golisi GL-4 18650 Battery Charger. This versatile 3‑in‑1 device is a wireless charger for smartphones, an efficient 18650 battery charger with an LCD display that shows real‑time charging status, and a portable power bank when loaded with fully charged cells. Designed with multiple safety protections—including short-circuit, over-current, and reverse connection safeguards—the Golisi GL-4 is the reliable solution for all your on‑the‑go power needs.
View Product
Battery Storage Best Practices
Batteries should never touch metal objects or each other outside of devices or chargers. Dedicated battery cases prevent shorts from pocket change or keys—a scenario that has caused serious injuries. Store batteries at room temperature away from direct sunlight and extreme temperatures.
Organizing Your Building Supplies
The Building Station Approach
Designate a specific area for building activities with dedicated storage for supplies. This prevents frustration from searching for misplaced tools and keeps everything accessible when inspiration strikes.
Simple drawer organizers or small parts cabinets work excellently for sorting different wire gauges, cotton types, and tools. Label everything clearly to avoid confusion between similar-looking wire types.
Inventory Management
Maintain a simple inventory of consumables—wire, cotton, and backup coils if you use pre-made options alongside DIY builds. Running out mid-build session disrupts flow and diminishes enjoyment.
Most builders find that keeping at least 10 metres of their preferred wire types and multiple cotton packs prevents unexpected shortages whilst avoiding excessive stock that degrades before use.
Common Supply Mistakes That Affect Performance
Using Expired or Degraded Cotton
Cotton doesn’t last forever, even when properly stored. If your cotton smells musty, looks discoloured, or has been stored for over a year, replace it. The cost of fresh cotton is minimal compared to the flavour degradation you’ll experience.
Mixing Wire Types Without Understanding Implications
Different wire types require different approaches. Using the same wrap count and diameter with Nichrome that you used for Kanthal creates dramatically different resistance and heating characteristics. Always verify specifications when switching wire types.
Inadequate Tool Maintenance
Wire cutters dull over time, reducing cutting precision and potentially damaging wire ends. Ceramic tweezers can chip if dropped on hard surfaces. Regular inspection and replacement of worn tools maintains building quality.
Neglecting Safety Equipment
Building supplies include items that pose safety risks if mishandled. Always use appropriate tools for each task, maintain proper lighting, and keep your workspace organized to prevent accidents.
FAQ: Building Supplies and Tools
How long do building supplies last?
Properly stored wire lasts indefinitely. Cotton maintains optimal quality for approximately one year when sealed and protected from moisture and odours. Tools last years with proper care, though consumables like wire cutter blades eventually require replacement.
What wire gauge should beginners start with?
For single-coil builds, 26-gauge Kanthal offers the ideal balance of manageability and performance. It’s thick enough to handle easily yet thin enough to heat efficiently at moderate wattages.
Is expensive cotton worth the investment?
Quality cotton significantly impacts flavour, but “expensive” doesn’t always mean better. Focus on reputable vaping-specific cotton brands rather than price alone. The difference between cheap beauty supply cotton and premium vaping cotton is substantial; the difference between premium options is often minimal.
How many different wire types should I keep on hand?
Most builders maintain two to three wire types that cover their typical building needs. A common combination includes Kanthal for everyday builds, stainless steel for temperature control experimentation, and perhaps Nichrome for quick-heating applications.
Building Success Through Proper Preparation
That frustrating scenario at the beginning—missing supplies, degraded cotton, lost tools—happens once to every builder. The difference between occasional builders and consistent enthusiasts lies in learning from that experience and establishing proper supply management.
Your building toolkit doesn’t need to be extensive or expensive. It needs to be complete, well-organized, and properly maintained. With the right supplies readily available, building transforms from an occasionally frustrating task into a genuinely enjoyable aspect of your vaping experience.
Visit any of our stores where our experienced builders can help you select the optimal toolkit for your building style and preferences:
Ready to build perfect coils consistently? Contact our team for personalised recommendations on building supplies that match your experience level and building goals.

by Divan Smit | Feb 16, 2026 | Coils & Atomizers
Reading Time: 4 minutes
There’s a moment in every vaper’s journey where pre-made coils start feeling limiting. You’ve experimented with different resistances, tried various brands, and spent considerable money on replacement coils—yet something’s missing. You want control over your vaping experience, the satisfaction of creating something with your own hands, and the freedom to build exactly what suits your preferences. The world of rebuildable tanks offers all this and more, but where do you actually start?
The truth? Building your first coil is far less intimidating than it appears, provided you start with the right equipment and understand the fundamentals. Here’s everything you need to know to begin your building journey with confidence.
Why Rebuildables Transform Your Vaping Experience
Last month, a regular customer at our Kyalami store mentioned he’d been putting off learning to build for over a year. His concern? “I’ll mess it up and waste money on equipment I can’t use.” Three weeks later, he’s building daily, experimenting with different configurations, and wondering why he waited so long.
This hesitation is common, but the reality is quite different. Start your building journey with our beginner-friendly rebuildable tanks featuring easy-to-use decks specifically designed to make your first builds straightforward and forgiving.
Understanding Rebuildable Tank Types
RDA: Rebuildable Dripping Atomizers
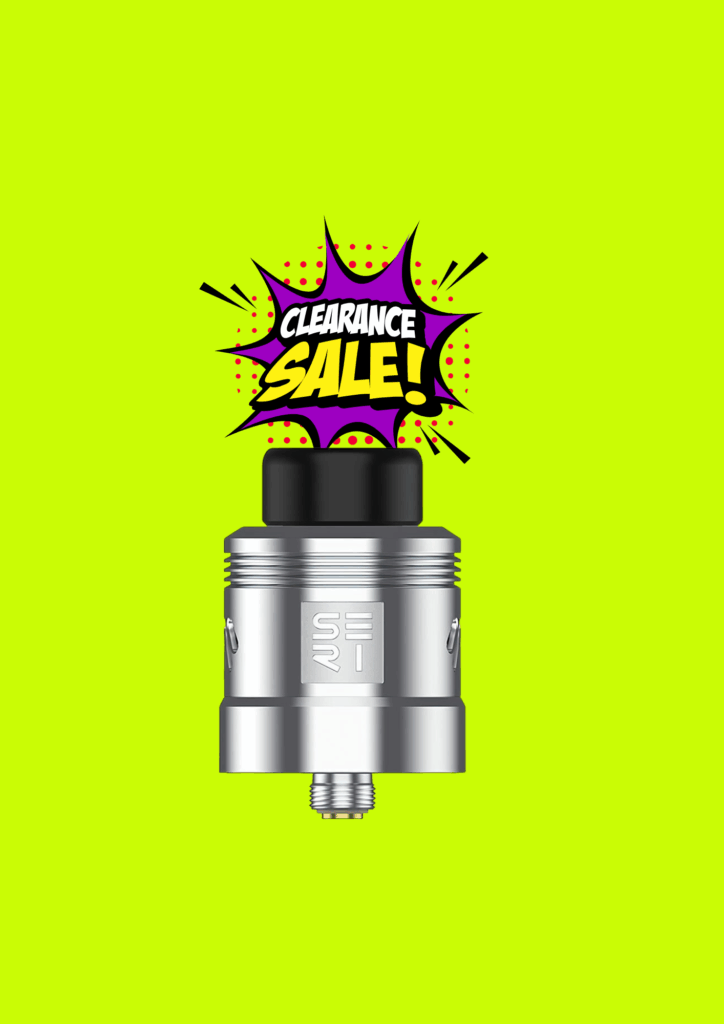
RDAs offer the simplest introduction to coil building. Without the complexity of tank systems or juice flow mechanisms, you focus purely on building and wicking. The Seri RDA exemplifies this approach with an accessible build deck that doesn’t overwhelm newcomers with unnecessary complications.
Dripping atomizers require manual e-liquid application directly onto your coils and cotton—a process that might seem inconvenient but actually helps beginners understand how wicking works and how much cotton their coils need.
RDTA: Rebuildable Dripping Tank Atomizers
RDTAs bridge the gap between pure dripping and tank systems. They combine RDA-style build decks with a small reservoir beneath, feeding e-liquid to your coils through wicking ports. The Helheim S RDTA offers this hybrid approach, providing the building simplicity of an RDA with the convenience of reduced dripping frequency.
RTA: Rebuildable Tank Atomizers
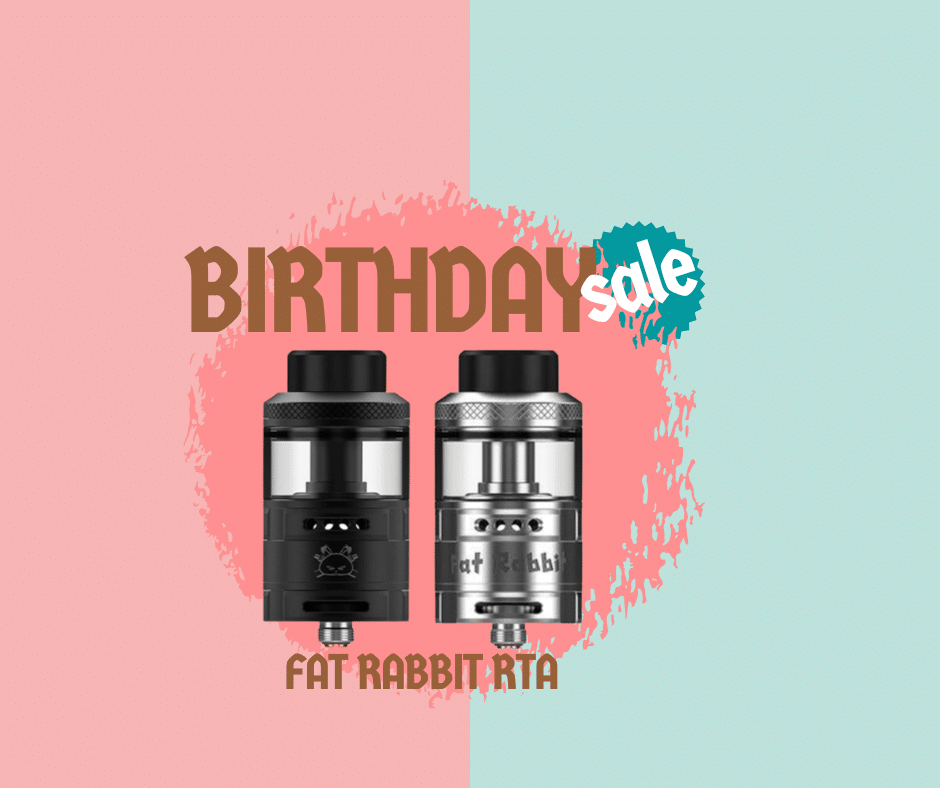
RTAs represent the most complex rebuildable option, featuring full tank capacity with bottom-fed wicking systems. While slightly more challenging for absolute beginners, modern RTAs like the Fat Rabbit RTA incorporate design improvements that make building and wicking considerably easier than older generations.
Essential Tools for Your First Build
The Absolute Necessities
You don’t need a workshop full of equipment to start building. These essentials cover everything for your first successful coil:
Coiling Rod or Screwdriver Set: Creates uniform coil wraps. Start with a 3mm diameter—it’s forgiving and works well for most builds.
Wire Cutters: Flush-cut wire snips specifically designed for coil wire. Standard wire cutters often leave sharp edges that create problems later.
Ceramic Tweezers: Essential for positioning coils and pinching wraps while firing. Ceramic doesn’t conduct electricity, preventing shorts whilst you work.
Cotton: Organic cotton designed for vaping ensures clean flavour without break-in periods. Avoid beauty supply cotton which may contain chemicals.
Coil Wire: Pre-made Kanthal wire offers the most beginner-friendly experience. Choose 24 or 26 gauge to start—thicker enough to handle easily, thin enough to heat quickly.
Nice-to-Have Additions
Ohm Meter: While most modern devices display resistance, dedicated ohm meters help troubleshoot builds and check for shorts before installing atomizers on your device.
Coil Jig: Makes wrapping uniform coils simpler, though not essential if you’re comfortable wrapping around a screwdriver or rod.
Building Your First Coil: Step-by-Step
Wrapping the Coil
Start with approximately 10 centimetres of wire. Secure one end against your coiling rod with your thumb, then wrap the wire around the rod in tight, even spirals. Aim for five to seven wraps initially—fewer creates lower resistance and hotter vapes, more creates higher resistance and cooler performance.
Keep wraps touching but not overlapping. Consistent spacing between the wire and even tension creates uniform heating, which is crucial for good flavour and vapour production.
Installing the Coil
Thread your coil leads through the appropriate posts on your build deck. Most beginner-friendly decks use simple screw terminals—position the coil centred over the airflow, tighten the screws, then trim excess wire close to the posts.
Before proceeding, check for shorts by gently pulsing your device at low wattage. The coil should glow evenly from the centre outward. If one section glows before others, gently squeeze the coil with ceramic tweezers whilst firing to compress the wraps evenly.
Wicking Your Coil
Cut a strip of cotton slightly wider than your coil’s inner diameter. Thread it through the coil—you should feel resistance but not struggle excessively. The cotton should move through the coil freely whilst touching all inner surfaces.
Trim the cotton tails at appropriate lengths. For RDAs, leave tails just touching the deck. For RTAs and RDTAs, tails must reach wicking ports without packing them too tightly, which restricts juice flow and causes dry hits.
Common First-Build Mistakes (And How to Avoid Them)
Too Much or Too Little Cotton
The most common beginner error involves wicking. Too much cotton restricts e-liquid flow, causing dry hits and burnt taste. Too little creates flooding and leaking. The cotton should slide through your coil with light resistance—if you’re pulling hard or it slides effortlessly, adjust accordingly.
Uneven Coil Heating
If your coil glows from one end rather than the centre, the wraps aren’t making consistent contact. Gently squeeze the coil with ceramic tweezers whilst pulsing at low wattage. This compresses wraps together and usually resolves uneven heating.
Hot Spots and Shorts
Overlapping wire or debris creates hot spots—localised areas that glow brighter than the rest of your coil. These burn cotton quickly and produce harsh hits. Always check for even glowing before wicking, and ensure no wire clippings remain on your build deck.
Incorrect Coil Positioning
Positioning your coil directly over airflow intakes maximises flavour and vapour production. Too high and you waste airflow efficiency. Too low and you risk juice spitting. Centre the coil horizontally and position it just above the airflow for optimal performance.
Developing Your Building Skills
Start Simple, Then Experiment
Your first builds should focus on mastering fundamentals rather than attempting complex configurations. Single-coil, round-wire builds teach essential skills without overwhelming complexity. Once comfortable with basics, experiment with dual coils, different wire gauges, and various resistances.
Keep a Building Journal
Document your builds with photos and notes. Record wire type, diameter, wrap count, resistance, and wattage preferences. This reference helps you recreate successful builds and understand what works for your preferences.
Learn From Each Build
Every build teaches something, even failures. Dry hit? Your wicking needs adjustment. Muted flavour? Try repositioning your coil or adjusting airflow. Harsh throat hit? Reduce wattage or increase resistance. Each iteration brings you closer to your perfect vape.
FAQ: Beginning Your Coil Building Journey
How long does it take to build a coil?
Your first build might take thirty minutes as you learn the process. With practice, most builders complete simple coils in under ten minutes, including installation and wicking.
Is building cheaper than buying pre-made coils?
Significantly cheaper over time. Initial tool investment ranges from modest to moderate depending on your choices, but wire and cotton cost a fraction of pre-made coils. Most builders recoup their investment within the first few months.
What if my first build doesn’t work?
First builds rarely achieve perfection. Common issues like flooding, dry hits, or poor flavour usually stem from wicking rather than the coil itself. Don’t get discouraged—remove the cotton, adjust, and try again. The learning process is part of the rewarding experience.
Which rebuildable type should beginners choose?
RDAs offer the gentlest learning curve with the most forgiving mistakes. Once comfortable building and wicking, progress to RDTAs or RTAs if you prefer reduced dripping frequency.
Your Building Journey Starts Here
That customer who waited a year before trying? He recently mentioned that building has become his favourite part of vaping—not just for the cost savings or performance benefits, but for the satisfaction of creating something perfectly suited to his preferences.
Your journey into rebuildables doesn’t require years of experience or extensive technical knowledge. It requires curiosity, patience, and the right equipment to start. Visit any of our stores where our experienced staff can demonstrate building techniques and help you select appropriate equipment:
Ready to take control of your vaping experience? Contact our team for personalised advice on choosing your first rebuildable and the tools you’ll need to begin building with confidence.
by Terblanche Fourie | Jun 6, 2025 | Coils & Atomizers, Maintenance
Estimated Reading Time: 6 minutes
|
• Proper priming extends coil life by up to 300% compared to dry burning
|
|
• Using the correct wattage range prevents premature coil burnout and maintains optimal flavour
|
|
• Quality e-liquids with lower sweetener content significantly reduce coil gunking
|
|
• Regular cleaning and maintenance can double your coil’s lifespan
|
|
• Rotating between different e-liquid flavours prevents flavour fatigue and extends coil longevity
|
Why Your Coil Care Routine Determines Your Vaping Success
Every experienced vaper has been there: you’re enjoying your favourite e-liquid when suddenly the taste turns harsh, the vapour production drops, and you’re left with that unmistakable burnt cotton flavour. At Vaper’s Corner, we’ve seen countless customers frustrated by coils that seem to burn out far too quickly, often within just a few days of use.
The truth is, most vapers unknowingly damage their coils through simple mistakes that could easily be avoided. After nearly a decade of helping South African vapers get the most from their devices, we’ve identified the key practices that separate coils lasting days from those lasting weeks. Whether you’re new to vaping or looking to optimise your current setup, proper vape coil care isn’t just about saving money—it’s about ensuring every puff delivers the flavour and satisfaction you expect.
The Foundation: Proper Coil Priming Techniques
Why Priming Makes All the Difference
The single most critical step in coil care happens before you even take your first puff. Proper priming ensures your coil’s cotton wick is fully saturated with e-liquid, preventing the dry burning that destroys coils instantly. We’ve observed that vapers who skip this step typically see their coils fail within 24-48 hours, whilst those who prime correctly often enjoy 2-3 weeks of consistent performance.
The Step-by-Step Priming Process
Start by applying 2-3 drops of e-liquid directly onto the visible cotton areas of your new coil. Install the coil into your tank, fill with e-liquid, and let it sit for at least 10-15 minutes. This waiting period allows the cotton to fully absorb the liquid, creating a protective barrier against heat damage.
For the first few puffs, start at a lower wattage than your coil’s recommended range, gradually increasing over the first day of use. This gentle break-in period helps establish proper wicking patterns and prevents thermal shock to the coil materials.
Wattage Management: Finding Your Sweet Spot
Understanding Your Coil’s Limits
Every coil has an optimal wattage range printed on its side, but many vapers treat this as a suggestion rather than a guideline. Operating outside these parameters—whether too high or too low—significantly reduces coil lifespan and affects flavour quality.
Running your coil at excessive wattage causes rapid e-liquid consumption and overheating, leading to burnt cotton and metallic tastes. Conversely, insufficient power creates poor vapourisation, causing e-liquid to pool and potentially leak whilst delivering weak flavour and vapour production.
The Goldilocks Principle
We recommend starting at the lower end of your coil’s recommended range and gradually increasing until you find your personal sweet spot. Most vapers discover their optimal setting sits around 70-80% of the maximum recommended wattage, providing excellent flavour whilst maximising coil longevity.
E-Liquid Quality: Your Coil’s Best Friend or Worst Enemy
How Sweeteners Affect Coil Life
Not all e-liquids are created equal when it comes to coil preservation. Heavily sweetened e-liquids, whilst often delicious, contain sucralose and other sweetening agents that caramelise under heat, creating a sticky residue that clogs your coil’s cotton and heating elements.
Dark, dessert-flavoured e-liquids typically contain higher concentrations of these coil-killing compounds compared to lighter fruit or menthol varieties. This doesn’t mean you should avoid your favourite flavours, but understanding their impact helps you make informed choices about when to use premium coils versus backup options.
Choosing Coil-Friendly Options
When selecting e-liquids for daily use, consider rotating between different sweetness levels and flavour profiles. This practice not only prevents palate fatigue but also gives your coils a break from harsh compounds. Our extensive e-liquid collection includes options specifically formulated for extended coil life without compromising on flavour.
Daily Maintenance Habits That Make a Difference
The Power of Consistent Care
Simple daily habits significantly impact coil longevity. After extended vaping sessions, allow your device to cool down completely before refilling. This prevents thermal expansion issues and reduces stress on your coil’s components.
Keep your tank’s e-liquid level above the coil’s intake ports to prevent dry hits. When the liquid level drops below these openings, air enters the wicking system, leading to poor saturation and potential burning.
Weekly Deep Care Routine
Once weekly, disassemble your tank and inspect your coil for signs of wear or buildup. Dark discolouration around the cotton or metallic deposits on the heating element indicate it’s time for replacement. However, light browning is normal and doesn’t necessarily require immediate action.
For tanks with removable coils, gentle cleaning with warm water can extend life between replacements. Remove the coil, rinse under lukewarm water, and allow to dry completely before reinstallation. Never attempt to clean coils whilst they’re still warm, as thermal shock can damage the internal components.
Advanced Techniques for Maximum Coil Life
Temperature Control Benefits
If your device supports temperature control (TC) mode, consider investing in compatible coils made from stainless steel, nickel, or titanium. TC prevents overheating by automatically adjusting power output when the coil reaches preset temperature limits, virtually eliminating dry hits and extending coil life considerably.
The Rotation Strategy
Serious vapers often maintain multiple tanks with different coil types and e-liquid flavours. This rotation system allows coils to rest between uses, preventing oversaturation and buildup whilst ensuring you always have a fresh flavour experience available.
FAQ: Common Coil Care Questions
How often should I replace my vape coils?
Coil replacement frequency depends on usage patterns, e-liquid types, and maintenance practices. With proper care, most coils last 1-3 weeks for average users. Signs it’s time to replace include diminished flavour, reduced vapour production, gurgling sounds, or persistent burnt tastes that cleaning doesn’t resolve.
Can I clean and reuse my coils?
Some coils can be gently cleaned to extend their life, particularly those with removable cotton wicks. However, modern sub-ohm coils with integrated cotton generally aren’t designed for cleaning. Attempting to clean non-serviceable coils often causes more damage than benefit.
Why do my coils burn out so quickly?
Rapid coil failure typically results from inadequate priming, excessive wattage, poor-quality e-liquids, or chain vaping without allowing time for rewicking. Review your vaping habits and ensure you’re following proper priming procedures with appropriately powered devices.
Maximise Your Investment with Quality Components
Proper coil care transforms your vaping experience from a constant cycle of replacements to a smooth, enjoyable routine. The techniques outlined here aren’t just theoretical—they’re proven methods developed through years of helping South African vapers optimise their setups.
When you’re ready to upgrade your coil game, explore our comprehensive selection of premium vaping coils designed for longevity and performance. Our knowledgeable staff can recommend the perfect coils for your device and vaping style, ensuring you get maximum value from every purchase.
Ready to put these techniques into practice? Visit any of our Vaper’s Corner locations in Atterbury, Equestria, or Kyalami for personalised advice, or browse our complete range online. Contact us at 010 110 1060 or info@vaperscorner.co.za for expert guidance on extending your coil life and enhancing your vaping journey.
by Terblanche Fourie | Apr 17, 2025 | Coils & Atomizers
|
• Drip tips enhance comfort and can influence flavour and vapour production.
|
|
• Coils are vital for heating e-liquid, directly affecting the quality of your vape.
|
|
• Cases protect and organise your vaping equipment, extending its lifespan.
|
|
• Choosing the right accessories can personalise and improve your vaping experience.
|
|
• Regular maintenance of accessories ensures optimal performance and safety.
|
Enhancing Your Vaping Experience with the Right Accessories
Embarking on the vaping journey introduces a myriad of devices and accessories, each promising to elevate the experience. For newcomers, the array of options can be overwhelming, while seasoned vapers continually seek enhancements to refine their sessions. Understanding the role of key accessories—drip tips, coils, and cases—is essential in navigating this landscape.
By delving into the functions and benefits of these components, vapers can make informed choices that align with their preferences and needs. This exploration not only enhances the enjoyment of vaping but also underscores the commitment to a personalised and satisfying experience.
The Role of Drip Tips in Vaping
What Are Drip Tips?
Drip tips serve as the mouthpiece of a vaping device, connecting the user to the vapour produced. Beyond their basic function, they play a pivotal role in influencing the comfort, flavour, and overall vaping experience. Available in various materials such as stainless steel, Delrin, and glass, each offers distinct advantages. For instance, stainless steel is renowned for its durability and heat resistance, while Delrin provides excellent insulation, preventing heat transfer to the lips. Glass drip tips, on the other hand, are favoured for delivering a pure and clean taste.
Drip Tip Options Available at Vaper’s Corner
Vaper’s Corner offers a selection of quality drip tips to match different vaping preferences and devices:
Benefits of Customising Drip Tips
Personalising drip tips allows vapers to tailor their devices to their preferences. A wider bore drip tip can increase airflow, resulting in larger vapour clouds, whereas a narrower bore enhances flavour concentration. This customisation not only caters to aesthetic desires but also significantly impacts the tactile and sensory aspects of vaping.
Choosing the Right Drip Tip for Your Needs
When selecting a drip tip, consider:
- Connection type – Ensure compatibility with your device
- Material – Consider heat resistance, durability, and taste neutrality
- Bore size – Wider for cloud production, narrower for flavour intensity
- Comfort – Ergonomic designs offer superior comfort for long sessions
- Aesthetics – Choose a style that complements your device and personal taste
Maintenance Tips for Drip Tips
To ensure optimal performance and hygiene:
- Regular Cleaning: Clean drip tips frequently to prevent residue buildup, which can affect flavour and hygiene.
- Inspect for Damage: Regularly check for cracks or chips that could compromise the vaping experience or pose safety risks.
- Avoid Sharing: Sharing drip tips can lead to the spread of germs; it’s advisable to use personal mouthpieces.
Understanding the Importance of Coils
Function of Coils in Vaping Devices
Coils are the heating elements within vaping devices that vaporise the e-liquid. Their design and material directly influence the flavour and volume of vapour produced. Over time, coils can degrade, leading to diminished performance.
Premium Coil Systems Available at Vaper’s Corner
Vaper’s Corner offers top-tier coil systems that elevate the vaping experience:
- Generous 6.4mL capacity with the bubble tank, perfect for all-day vaping without constant refills
- Innovative 272° airflow ventilation system
- Threaded top fill system for convenient, mess-free refilling
- Durable stainless steel construction ensuring longevity and consistent performance
- Revolutionary Duplex patented mesh technology
- Ample 4ml e-liquid capacity
- User-friendly top refilling mechanism minimising downtime and potential messes
- Optimised bottom airflow system
- Instant firing capability
Signs It’s Time to Replace Your Coil
Recognising when to replace a coil is crucial:
- Diminished Flavour: A noticeable drop in flavour quality indicates coil wear.
- Reduced Vapour Production: Less vapour than usual can signal a failing coil.
- Burnt Taste: A burnt or unpleasant taste often means the coil has deteriorated.
Selecting the Right Coil for Your Vaping Style
Choosing coils that align with your vaping habits enhances the experience. For instance, sub-ohm coils are ideal for those seeking larger clouds and more intense flavour, while higher resistance coils cater to a more subdued vaping style.
Protecting Your Investment with Vape Cases
Why Use a Vape Case?
A vape case like Wotofo, safeguards your device and accessories from physical damage and environmental factors. It also aids in organising components, making transportation convenient and reducing the risk of misplacement.
Features to Look for in a Quality Vape Case
When selecting a vape case, consider:
- Durability: Robust materials that offer protection against drops and impacts.
- Compartments: Adequate space and pockets for organising devices, e-liquids, and accessories.
- Portability: Compact design for ease of transport without compromising on storage capacity.
FAQs
How often should drip tips be cleaned?
Regular cleaning is recommended, ideally once a week, to maintain hygiene and optimal flavour.
Can any coil be used with any vaping device?
Not all coils are universally compatible; it’s essential to use coils specified for your device to ensure safety and performance.
Are vape cases necessary for all vapers?
While not mandatory, vape cases are highly beneficial for protecting equipment and organising accessories, especially for those who travel frequently.
Elevate Your Vaping Journey with the Right Accessories
Understanding and investing in quality drip tips, coils, and cases can profoundly enhance your vaping experience. These accessories not only personalise your sessions but also contribute to the longevity and performance of your device. For guidance on selecting the perfect accessories tailored to your needs, reach out to Vaper’s Corner at info@vaperscorner.co.za or call 010 110 1060. Our team is dedicated to assisting you in navigating the diverse world of vaping accessories to find the ideal fit for your lifestyle.
by Nellah | Mar 13, 2025 | Coils & Atomizers
|
• Aspire Nautilus BVC coils deliver rich flavor and consistent vapor production.
|
|
• Designed with Bottom Vertical Coil (BVC) technology for enhanced durability.
|
|
• Made with organic cotton and enlarged wicking ports for smooth hits.
|
|
• Available in multiple resistance levels to suit different vaping styles.
|
|
• Easily replaceable and compatible with various Aspire Nautilus tanks.
|
The Perfect Coil for a Superior Vaping Experience
Every vaper, whether a seasoned connoisseur or a newcomer transitioning from cigarettes, knows that coil quality makes all the difference. Poor-quality coils lead to muted flavors, inconsistent vapor production, and an overall frustrating experience.
Aspire’s Nautilus BVC coils solve these problems by providing reliable, high-performance vaping with intense flavors and a smooth draw. Designed for longevity and compatibility, these coils take your vaping sessions to the next level.
At Vaper’s Corner, we have seen firsthand how the right coil transforms a vape. Our customers consistently return for Aspire Nautilus BVC coils because they deliver quality and consistency every time. If you’re looking to elevate your vaping experience, you’re in the right place.
What Makes Aspire Nautilus BVC Coils Special?
Unmatched Flavor and Vapor Production
Aspire’s Bottom Vertical Coil (BVC) technology ensures a consistently flavorful and satisfying experience. By positioning the coil vertically, these coils provide better airflow and even heating, resulting in smoother draws and enhanced vapor production.
Designed for Longevity
Made with high-quality organic cotton and featuring enlarged wicking ports, Aspire Nautilus BVC coils are built for durability. These features improve e-liquid absorption, reduce dry hits, and extend the lifespan of the coil, ensuring fewer replacements and more enjoyment.
Multiple Resistance Options for Your Ideal Vape
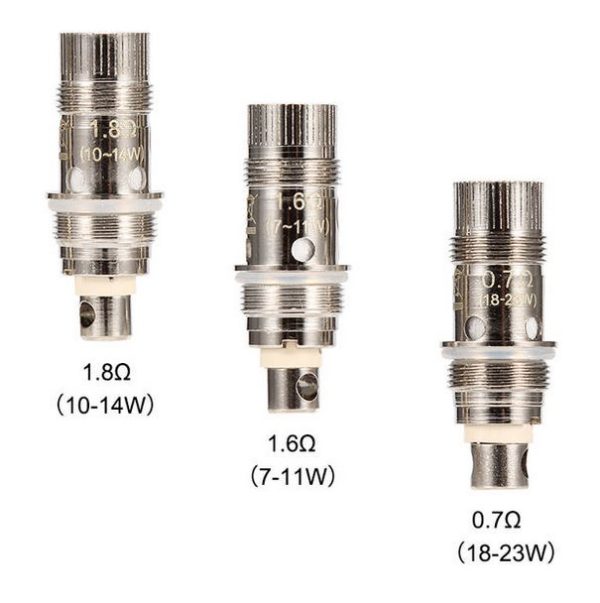
One size doesn’t fit all when it comes to vaping. That’s why Aspire Nautilus BVC coils come in different resistance levels to match your preferred vaping style:
- 0.4Ω (23-28W) – Ideal for those who prefer a slightly warmer vape with richer clouds.
- 0.7Ω (20-25W) – A great balance between flavor and vapor production.
- 1.6Ω (7-12W) – Designed for a smooth, mild experience with high nicotine e-liquids.
- 1.8Ω (9-13W) – Perfect for mouth-to-lung (MTL) vaping, closely replicating the feel of smoking a cigarette.
Easy Installation & Broad Compatibility
These coils are compatible with several Aspire tanks, including:
- Aspire Nautilus
- Nautilus Mini
- Nautilus 2
- Nautilus AIO
Swapping out coils is hassle-free, making them an excellent choice for vapers who want convenience without sacrificing performance.
A Smart Choice for Former Smokers
If you’re transitioning from smoking to vaping, using the right coil can make the switch easier. Nautilus BVC coils provide a satisfying throat hit and smooth draw, helping former smokers adjust to their new vaping experience.
FAQs About Aspire Nautilus BVC Coils
1. How often should I replace my Aspire Nautilus BVC coil?
Coil lifespan varies depending on usage, but generally, replacing your coil every one to two weeks ensures optimal flavor and vapor production. Signs it’s time for a new coil include muted flavor, a burnt taste, or reduced vapor output.
2. Which resistance level should I choose?
- If you enjoy thicker clouds and warmer vapor, go for the 0.4Ω or 0.7Ω coils.
- If you prefer a mouth-to-lung experience with a tighter draw, 1.6Ω or 1.8Ω coils are ideal.
- For nicotine salts or high-nicotine e-liquids, opt for the 1.6Ω or 1.8Ω resistance levels.
3. Where can I buy Aspire Nautilus BVC coils in South Africa?
You can purchase Aspire Nautilus BVC coils from our online shop or visit any of our Vaper’s Corner stores in Atterbury, Equestria, or Kyalami. We offer a range of vape accessories to enhance your experience.
Upgrade Your Vape with Aspire Nautilus BVC Coils
At Vaper’s Corner, we believe that every vape should be smooth, flavorful, and satisfying. Whether you’re a beginner or an experienced vaper, Aspire Nautilus BVC coils provide the performance and consistency you need.
Looking for high-quality coils? Order online or visit one of our stores today! Shop now: Vaper’s Corner Online Store
by Terblanche Fourie | Nov 22, 2024 | Coils & Atomizers, Maintenance
Key Takeaways
- Sweetened e-liquids and high wattage vaping can cause coil buildup, shortening coil lifespan.
- Cleaning your vape coils can extend their life and improve performance.
- Soaking coils in ethanol or ultrasonic cleaning are effective methods for cleaning.
- Cleaning doesn’t restore coils to brand-new performance but can save costs.
- Always prime your coils before reuse to enhance their performance.
Does Your Vape Coil Need a Reset? Here’s How to Save It
If you’ve ever found yourself replacing vape coils far too often, you’re not alone. Sweetened e-liquids and low-resistance vaping can wreak havoc on your coils, making them clog up quickly and forcing you to toss them out sooner than you’d like.
The good news? You don’t always have to splurge on replacements. Cleaning your coils can extend their lifespan, save you money, and even bring some life back into your vape’s flavor. While it won’t make your coils brand new again, it’s a practical way to keep your vaping experience smooth without constantly replacing hardware.
Let’s walk you through how to clean vape coils effectively, so you can make the most of every puff.
Why Do Vape Coils Get Dirty So Quickly?
- Sweetened E-Liquids and Coil Gunk
Many e-liquids are sweetened with sucralose, an artificial sweetener that caramelizes when exposed to heat. This sticky residue builds up on your coils, forming what’s often referred to as “coil gunk.” Over time, this not only diminishes the flavor of your vape but also burns and renders your coils unusable.
- High Wattage and Sub-Ohm Coils
Low-resistance (sub-ohm) coils vaporize a larger volume of e-liquid with each puff. Combine this with sweetened e-liquids, and you have the perfect storm for clogged coils.
- Heavy Usage
If you’re a frequent vaper, your coils will naturally experience more wear and tear. The good news is that with regular maintenance, you can slow this process down.
How to Clean Your Vape Coils: Two Proven Methods
1. Cleaning Coils by Soaking
This method is simple yet effective, using common household items to clean your coils:
- Soak the coil in ethanol, vinegar, or vodka for a few hours.
- Agitate the coil occasionally to loosen any buildup.
- Rinse thoroughly under running water, then with distilled water for a final cleanse.
- Blow air into the coil to expel excess water from the wicking holes.
- Let the coil air dry completely before reusing.
To save on cleaning supplies like vodka, wait until you have several coils to clean at once.
2. Using an Ultrasonic Cleaner
An ultrasonic cleaner, typically used for jewelry, can clean vape coils with remarkable efficiency:
- Fill the cleaner with water and submerge your coil.
- Turn on the cleaner and let it agitate the coil for several minutes.
- Remove the coil, rinse under distilled water, and let it dry completely.
This method offers a deep clean, often making coils look and perform nearly like new.
Is Cleaning Vape Coils Worth It?
The answer depends on your vaping habits:
- If you’re using sub-ohm coils and sweetened e-liquids, cleaning coils can save you significant money.
- For low-wattage MTL (mouth-to-lung) vapers whose coils already last a few weeks, cleaning might not be worth the time and effort.
Remember, even cleaned coils won’t deliver the same flavor quality as brand-new ones, but they’ll still provide a smoother and more cost-effective vaping experience.
FAQ
- How often should I clean my vape coils?
It depends on your usage and the type of e-liquid you use. If you vape sweetened e-liquids or use sub-ohm coils, cleaning once every couple of weeks is a good start.
- Can I use water instead of alcohol for soaking coils?
While water can help remove light buildup, ethanol or vodka dissolves coil gunk more effectively, giving you a deeper clean.
- What does it mean to “prime” a coil?
Priming a coil means saturating the wicking material with e-liquid before use. This prevents dry hits and extends the coil’s lifespan.
Bring New Life to Your Coils—and Your Vaping Experience
Cleaning your vape coils isn’t just about saving money; it’s about getting the most out of your vaping sessions. Whether you’re a seasoned vaper or just starting your journey, maintaining your coils can elevate your experience.
Need quality vape products or advice on coil care? Visit our online store today or call us—we’re here to help you make every puff count!
by Terblanche Fourie | Nov 22, 2024 | Coils & Atomizers
Key Takeaways
- Priming vape coils ensures your device delivers optimal flavor and performance.
- A properly primed coil prevents burnt hits and prolongs its lifespan.
- The process involves soaking the coil’s wicking material with e-liquid before use.
- Over-priming, or flooding, can lead to gurgling sounds, but it’s easy to fix.
- Regular coil maintenance ensures a smooth vaping experience without unpleasant tastes.
Imagine investing in a brand-new vape coil, eagerly filling your tank with your favorite e-liquid, only to take a burnt-tasting puff on the first try. It’s frustrating, wasteful, and entirely preventable. Priming your vape coil is the simple yet crucial step to avoid this and unlock the true potential of your vaping device. At Vaper’s Corner, we’ve guided countless customers through this process to enhance their vaping experiences. Let me show you how to get it right every time.
What Is a Vape Coil and Why Does It Need Priming?
Understanding the Basics
Vape coils are the heart of your vaping device. Housed within metal casings called atomizer heads, these coils heat up to vaporize the e-liquid soaked into their wicking material. Whether your coil features traditional wire or advanced mesh, proper priming ensures the wicking material is saturated, preventing it from burning.
The Importance of Priming
Priming your coil means saturating the wicking material with e-liquid before firing your device. This step safeguards your coil from delivering burnt hits, a common frustration for vapers. Burnt wicking not only ruins the flavor but also forces you to replace the coil sooner than necessary.
How to Prime Your Vape Coil in 5 Simple Steps
- Fill Your Tank or Pod
Begin by filling your device with e-liquid. Ensure you follow your device’s instructions for filling tanks or pods.
- Let It Sit
Allow the wicking material to absorb the e-liquid for 5–10 minutes. Thicker e-liquids with high vegetable glycerine (VG) content may take longer to saturate.
- Take a Priming Puff
Before firing the device, take a few puffs without pressing the fire button. This action helps draw e-liquid further into the coil.
- Start Low and Go Slow
If your device has adjustable wattage or temperature settings, start at a lower level for your first puff. Gradually increase the setting to your preferred level.
- Vape and Enjoy
Once primed, you’re ready to enjoy a smooth, flavorful vaping experience.
Common Issues and Solutions
Flooding Your Coil
Over-priming, or flooding, occurs when the coil holds more e-liquid than the wicking can absorb. If your device gurgles or spits when fired, flick it gently over a sink to expel excess liquid.
Defective Coils
Occasionally, a coil may be defective right out of the box. If your coil doesn’t perform even after priming, it’s likely faulty and needs replacing.
Knowing When to Replace Coils
Over time, even well-primed coils will degrade. If your vape tastes off or produces burnt hits, it’s time for a replacement. Mesh and ceramic coils generally last longer than traditional wire options.
FAQs About Priming Vaping Coils
Q: How long should I let my coil soak before vaping?
A: Ideally, 5–10 minutes is enough, but thicker e-liquids may require more time.
Q: Can I prime pre-filled pods or disposable devices?
A: Pre-filled pods are typically pre-primed, but if a pod runs dry, follow the same priming steps before reuse. Disposable devices are not designed for priming or refilling.
Q: What happens if I don’t prime my coil?
A: Skipping priming leads to burnt wicking, which produces unpleasant flavors and may release harmful chemicals. The coil will also become unusable.
Keep Your Coils Performing Like New
Priming your vape coil isn’t just a helpful tip; it’s an essential part of a satisfying vaping routine. With a few minutes of care, you can enjoy better flavor, extended coil life, and an all-around superior experience. At Vaper’s Corner, we’re here to ensure you have the knowledge and products you need for a seamless vape journey.
If you’re unsure about priming or need replacement coils, visit our online store or contact us today. Our team is always ready to assist you in making the most of your vaping setup. Let’s elevate your vape game together!
by Terblanche Fourie | Nov 22, 2024 | Coils & Atomizers
|
• Vape coils are essential for creating vapor by heating e-juice.
|
|
• Coils can be cleaned and reused in some cases but may not perform like new.
|
|
• Cleaning is a good temporary solution when replacement coils aren’t available.
|
|
• Properly priming and maintaining your coils can extend their lifespan.
|
|
• Regularly replacing worn coils ensures a better vaping experience.
|
Vape coils are the heart of any vaping device, designed to heat e-juice into vapor. Made from metals like stainless steel or kanthal, these small wires heat up when electricity flows through them. Coils are surrounded by wicking material that absorbs the e-juice, ensuring consistent vapor production when you take a puff. Over time, the heating and cooling process can degrade the coil, impacting performance and flavor.
Can You Clean and Reuse Vape Coils?
Yes, vape coils can be cleaned and reused, but it’s not a long-term fix. Over time, coils wear out due to residue build-up and heat exposure, leading to diminished performance. Cleaning can temporarily extend their life, but it won’t restore their original efficiency. It’s a practical option if replacement coils aren’t immediately available or if you accidentally burn your coil.
Pros and Cons of Cleaning Vape Coils
Pros:
- Prolongs coil life when replacements aren’t accessible.
- Reduces waste and saves money temporarily.
Cons:
- Cleaned coils may still produce dry hits or reduced vapor.
- Residual wear and tear often lead to diminished performance.
Step-by-Step Guide: How to Clean Your Vape Coils
- Remove the Wick: Take out the wicking material from the coil carefully.
- Rinse Under Warm Water: Run warm water over the coil to remove e-juice residue.
- Soak in Hot Water: Place the coil in a bowl of hot water for 20-30 minutes.
- Air Dry Completely: Let the coil dry completely before reinstalling it.
Pro Tip: Ensure the coil is fully dry before use to avoid damaging it or your device.
FAQs
Can cleaning a coil restore its performance completely?
Not entirely. While cleaning removes residue, it doesn’t repair the wear caused by heat. Over time, the coil will still need replacement.
How often should I replace my coils?
The lifespan varies based on usage, but most coils last between one to four weeks. Signs like diminished flavor or burnt hits indicate it’s time for a new coil.
What are some tips to extend coil life?
Always prime your coil before use, avoid vaping with an empty tank, and use e-liquids suited to your device.
Conclusion: Keep Your Vaping Experience Fresh and Flavorful
While cleaning and reusing vape coils can be a handy temporary solution, nothing beats the performance of a fresh coil. Maintaining good vaping habits, like priming coils and monitoring tank levels, can also help prolong coil life. For a seamless vaping experience, ensure you have replacement coils readily available.
Need high-quality coils or expert advice? Visit our online store or contact us today. Let us help you elevate your vaping journey!

by Terblanche Fourie | Oct 24, 2024 | Coils & Atomizers, News
Introduction
Venturing into the world of vaping can often leave you tangled in a web of technical terms, with one word meaning different things in various contexts. Today, let’s demystify one of the most crucial components of your e-cigarette: the vape coil. Understanding this key element can significantly elevate your vaping experience, whether you’re a novice or a seasoned enthusiast.
Key Takeaways
- Understanding Coils Enhances Vaping: Grasping coil basics can transform your vaping sessions from mundane to magnificent.
- Choose According to Your Needs: Select coils that suit your vaping style and device specifications for optimal results.
- RDA vs RTA Choices: Knowing whether an RDA or RTA better suits your vaping style can significantly impact your overall experience.
- RDAs offer maximum flavor and cloud production for enthusiasts willing to frequently drip e-liquid, while RTAs provide a more convenient setup with less frequent refills.
Regular Maintenance Matters: Keep your coils in top shape through routine cleaning and timely replacement.
Explore to Optimize: Experiment with different types of coils and rebuildable atomizers to find what truly works for your vaping preferences.
What is a Vape Coil?
At the heart of every e-cigarette lies the vape coil, a critical component that heats the e-liquid and transforms it into vapor for you to inhale. Essentially, a vape coil consists of a wire wound in a spiral configuration around a wicking material. This setup is housed within the atomizer head of your device, bridging the battery’s positive and negative poles.
When activated, the battery warms the coil, which in turn vaporizes the e-liquid soaked into the wick. The resulting vapor ascends through the tank’s chimney, delivering the flavorful or nicotine-infused mist to your mouth.
The materials used for the coils vary, with stainless steel being the most common due to its durability and resistance to heat.
Coils and Atomizer Heads: Understanding the Setup
- Atomizer heads, often simply called ‘coils,’ are replaceable units that comprise the wick, coil, and casing. These components are usually situated at the bottom of the tank to maximize e-liquid absorption.
- Replacing these coils is straightforward: simply twist off the old coil and replace it with a new one. This ensures your device functions optimally and extends its lifespan.
Coil Configurations and Their Impact
Vape coils can be single, dual, or even quad-coil configurations:
- Single-Coil setups are energy efficient and simpler to maintain.
- Multi-Coil configurations, including dual and quad coils, generate more vapor and intensify flavors but consume more battery power.
The Significance of Ohms in Vaping
Coils are characterized by their resistance, measured in ohms. The resistance level affects the vaping experience:
High-Ohm Coils (above 1 ohm) are standard, producing less vapor and flavor, using less battery power and e-liquid.
Sub-Ohm Coils (below 1 ohm) appeal to those who prefer dense clouds and intense flavors, though they require compatible advanced devices.
RDA vs RTA: What’s The Difference?
Exploring the realms of rebuildable atomizers brings us to RDAs and RTAs—two popular styles each offering unique benefits. RDAs (Rebuildable Dripping Atomizers) require manual dripping of e-liquid onto the coil and are known for large build platforms that facilitate bigger, more complex coil builds, leading to massive cloud production. RTAs (Rebuildable Tank Atomizers), on the other hand, incorporate a tank for e-liquid storage and offer the convenience of less frequent refills.
Choosing between an RDA and an RTA depends on your preference for convenience versus performance.
When to Replace Your Coil
Coils are not designed to last forever. You’ll need to replace them if you notice a decrease in vapor production, a muted flavor, or a burnt taste. Regular vapers might find themselves changing coils every few weeks to maintain the best experience.
Frequently Asked Questions
Q: How often should I replace my vape coil?
A: Typically, replace your coil every two to three weeks, depending on usage.
Q: Can I clean a vape coil instead of replacing it?
A: Cleaning can extend a coil’s life but replace regularly to avoid poor performance.
Q: What does ‘sub-ohm’ mean?
A: Sub-ohm refers to coils with a resistance less than one ohm, favored for producing large vapor clouds and strong flavors.
Q: What are the differences between an RDA and an RTA?
A: RDAs (Rebuildable Dripping Atomizers) require you to manually drip e-liquid onto the coil and are favored for their ability to produce large vapor clouds and intense flavors due to open airflow and large coil builds. RTAs (Rebuildable Tank Atomizers) combine the customizability of building your own coils with the convenience of a tank, offering more consistent vaping without frequent refills.
Q: Should I choose an RDA or an RTA?
A: Choose an RDA if you prioritize customization and maximum vapor production and don’t mind frequent refilling. Opt for an RTA if you prefer a balance between customizable coils and the convenience of a tank system. Your choice should align with your vaping preferences and lifestyle needs.
Conclusion: Maximize Your Vaping Journey
Understanding and managing your vape coils are crucial for a satisfying vaping experience. Whether you’re chasing flavor or clouds, the right coil makes all the difference. At Vaper’s Corner, we’re committed to guiding you through the complexities of vaping. Need help or have questions about your setup? Give us a call—we’re here to help every step of the way!

by Divan Smit | Jul 8, 2019 | Coils & Atomizers
When it comes to vape mods, there are hundreds of options to choose from. You get atomizers that drip the e-liquid onto the coil, you get vape mods that use a tank, and you get ones that can be custom built. Each one is different, and they all have their uses for beginner and serious vapers.
So what kinds of vape mods are out there? There are many variants, but the main ones that people refer to when talking about “vape mods” are RDA’s and RTA’s. So what are they, and what do they do?
RBA Vape Mods
Before we look at both variations of the vape mods, let’s have a look at the parent genre of vape mods, called “RBA\’s. RBA stands for ReBuildable Atomizers. In a nutshell, these types of vape mods are generally more advanced than e-cigarettes or “pod mods”, and often require the vaper build and/or replace the coils in their vape mod. The differences lie in the application of the e-liquid onto the coils.
Naturally, you get different variations of the coils themselves, but the two subsets are pre-built coils and custom-built coils. Pre-built coils are perfect for the beginner vaper, who wants to advance from e-cigarettes or pod mods, but doesn’t feel like custom-winding their coils every time. It’s a simple “open the vape mod, remove the old coil, clean, replace, close” process. With custom-built coils, it’s a little more advanced. The vape mods that take custom-coils vary in the number of coils they take, the size of the coils, and the wire-type of the coils. Anything from round wire to Clapton coils is on the table here.
You get RBA\’s with variable wattage and non-variable wattage. The higher the wattage, the hotter the coils get, and that will change the consistency of the clouds that you’re wanting to create. Sometimes vapers prefer non-variable wattage, as they don’t have to worry about whether the coils are too hot for the e-liquid or not. But variable or not, each vaper is different, and equally, so are the vape mods that they use.
The main differences between RTA and RDA atomizers are the application of the e-liquid though, and that’s what this next section is about.
RTA’s
RTA stands for Rebuildable Tank Atomizer. These are very popular rebuildable atomizers as they require less-frequent filling. They work via capillary action, ie: the e-liquid is drawn to the coils via a cotton(or another type of) wick that moves the liquid from the tank to the coils like little straws.
The size of the tanks varies from the baby 2ml tanks, all the way to the huge 8ml tanks. Bigger tanks mean longer vaping. These are popular amongst vapers who are constantly using their vape mods (either when attempting to quit smoking or a “one-flavour” vaper). The only downside to this is that a vaper has to finish the flavour in the tank or dispose of it before they can use a different one.
The other downside to an RTA is that the cleaning and assembly process can be somewhat more cumbersome than an RDA (which we will talk about further down). More components mean more connections, and more connections mean more to clean, and it will take slightly longer to replace the coils nested underneath the tank.
RDA’s
RDA stands for Rebuildable Dripping Atomizer. These vape mods are used by cloud chasers or vapers that like to constantly taste and try different flavours The way they differ from a RTA, is that the vaper drips the e-liquid directly onto the coils manually, before heating them up to create the clouds. Generally, this method lasts(depending on your wicking) between five to ten puffs before the liquid is vaporized, and requires more filling. The flavour on an RDA is also considered better than any other form of atomizer.
The benefits to these vape mods, is that the vaper can experiment with new vape flavors before buying, as a few drops is a lot more cost-effective than buying a bottle of flavour. The other benefit, is that custom blends of VG and PG can be experimented with to craft the perfect cloud and/or flavour experience. All in all, an RDA is the more popular choice for seasoned vapers who know what they want, and how to get it. As stated earlier, they’re also easier to clean, as you don’t have a tank above the coils, so you can replace the coils a lot faster than if you were using a RTA.
Which One?
After all of this, you might be wondering which type of vape mod you should go for? If you prefer to buy flavors in bulk, and go through one flavor at a time, or if you’re trying to quit smoking and require a lot of e-liquid every day, then an RTA is the one that you should go for.
However, if you vape because you enjoy the variety of flavours, or you’re a cloud chaser, then an RDA is the one for you.
But, the main thing you need to go for, is the one that makes you happy. Choose the one that feels right, that you can see yourself using, and that does what you need it to. Don’t feel pressured by your friends to choose the same as them because that’s what they use. Whichever vape mods you go for, should be the ones that you want.